
MG Gouf Custom WIP 05
Overall major detail update; more panel lines, scratch built parts, and color separation!
 Dashing closer to the finish line!
Overall View:

Parts Detail:

 Added panel lines and some pla beam details on the back of the arms, needs rework.
 I got some pla beams and they came in useful. The armor here is not finished yet, this area is giving a lot of trouble and is not going as plan XD
 New attachment to side skirt armor, not perfect but very close to what i had in mind.

 Lots of color separation on the legs, some areas are too blotchy. I basically used a grey gundam maker, then lightly gave it a wipe so it leaves a light grey tone.
Weapon Layout Test:
 I want to set up his weapons like this for standby mode. In battle he can take off the shield and choose to attach the gattling gun if necessary.
Posing:
 Mimic RG Zaku pose 😛
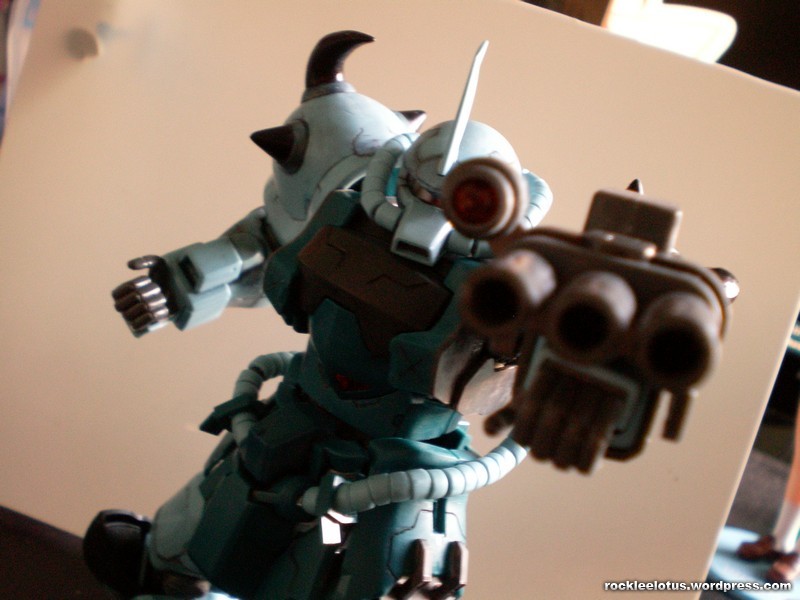
 Dash! I like this shot and the exposed backpack looks so friggin cool! I may leave it partially exposed ^^
What do you think so far?
Questions!
1) How can I make ball joints tighter? His legs are a bit wobbly.
2) Gouf Customs sword will melt to a beam saber? Might make him a beam weapon if this is the case.
3) I forgot…
Thanks!
Next is scratch building the backpack, finish chest armor and then more detailing and weapon mods… and here I thought I was almost done. XD


![conspicuous klu[x]](https://rockleelotus.files.wordpress.com/2010/01/klux_banner-copy.gif "http://kluxorious.blogspot.com/")


Nice detialing I still hav to improve on my art
thanks! it takes practice but once you find a style you like it gets easier ^^
Beam weapon yes!
yea! i wana make him a close combat brute, so he needs something that can go against beam weapons.
damn that looks sooo badass! nice work!
1- apply some cement or superglue to the ball and wait till it fully dries so that the ball will gives tighter grip or something.or else, wrap the ball with some plastic or paper
2- i wonder if the sword is anti-beam or something?
thanks man! 😀 he will make his opponents cower in fear!
i just ran outta superglue but i will try the paper/plastic before going with the cement.
i dunno if it is, when he hits with his sword all it does is dent armor so im thinking its just steel. i dont think its like a heat rod either… can heat rods stand up against beam saber? XD
Tightening the joints.. 2 layers of clear topcoat would do the trick.
thanks, that sounds like the best way to go. i have yet to play with sprays, and all my kits could use a good ol matte coat in general… maybe next year lol XD
Keep in mind to spray 30 cm (1 foot) away from the gunpla.. The weather must be sunny and not cold. Be also sure that there’s not much humidity
So yeah.. Cold weather/humidity messes up the topcoat
OMFG. Blue + Monoeye + Close Combat + Details = WIN. Grewat job mate ;D
hey Mena thanks for stopping by ^^ Gouf Custom is bad ass, im glad im doing him some justice with the customizations!
I like your extra pla beam details ^^
you even put it on the inner side of the armor, great job rocklee!
you might want to try applying extra thin cement and sanding after scribing panel lines. I saw it on a vid.
as for the panel line design, it is sweet and gives your gouf an RG feel. I love the panels bro!
thanks ^^ pla beams a cool, makes building parts a bit easier!
ahh thanks for the tip sensei lol atm i dont have thin cement though, and i wonder if it will clean up nice without painting after wards since i cant do that. ill try some testing on small areas first, you can really see the scribbly panel lines in some of these pics now huh? ^^;
uh, I am not a sensei rocklee >.<
haha natural reaction as i feel i learn so much about how patience and detailing can improve a kit from your wips 😛
Nice panel line patterns 😀 it makes him look stronger!
The choice of color for his shoulder spike is also nice, the usual all-blue shoulder is a kind of monotone so by coloring the spikes, it add a huge difference 😀
yea his armor looks more reinforced!
i thought the same so i made the spikes black to match the bottom of his feet and knees, it works out really well and makes him look less toy like.